
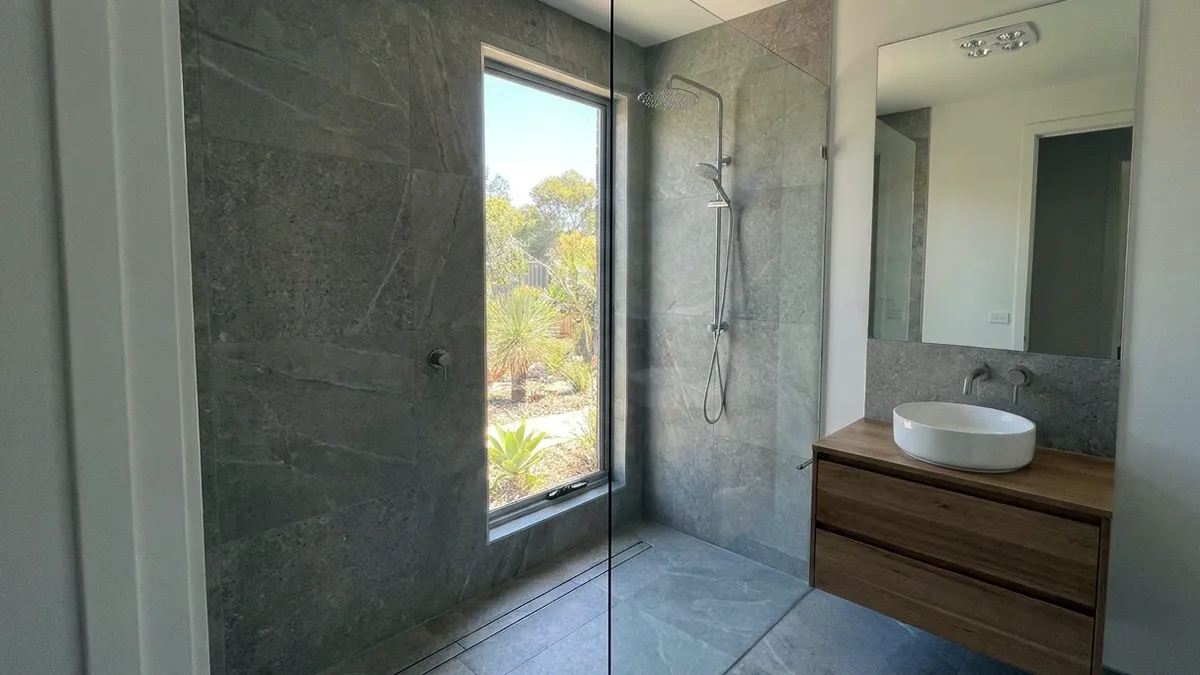
A hobless shower is a shower with no step at the entry, so the shower floor sits level with the rest of your bathroom. It needs three things: the right floor fall, a drain that keeps up and a well-placed shower head. Get those right and you’ll never step over a hob again. Get them wrong and water ends up on your bathroom floor every day.
What Is a Hobless Shower?
A hobless shower (also called a curbless, level-entry, step-free or zero-threshold shower) has a floor that sits level with the rest of the bathroom. There’s no raised step, or “hob”, at the entry. Instead, the shower floor is sloped towards a linear or point drain, so water runs away without needing a barrier to hold it in.
Hobless vs Doorless: Know the Difference
These two terms get mixed up a lot, and the difference changes how much space you need.
- Hobless describes the floor. There’s no step into the shower. A hobless shower can go into a small bathroom as long as it has a glass door. See our small bathroom ideas for layouts that make the most of a tight footprint.
- Doorless describes the enclosure. There’s no door, usually just a fixed glass panel. A shower that is both hobless and doorless needs a lot more room, or water will spread across your bathroom floor.
Required in Most of Australia, Optional in NSW
In states that have adopted the National Construction Code’s Livable Housing Design Standard, every new home must have at least one shower with a hobless, step-free entry. A lip of up to 5mm is allowed to hold water back. Walls must also be reinforced for future grab rails. That’s it.
Six of Australia’s eight states and territories now apply these rules to new homes. NSW and Western Australia haven’t adopted them. In Sydney, a hobless shower is your choice, not a requirement, but it’s the benchmark most other states now build to. If you’re planning to stay in your home as you get older, it’s one of the most practical upgrades you can make. Adding wall reinforcement while the walls are open costs very little.
How Much Space Do You Need?
As a practical guide, a hobless shower with a door needs at least 900mm x 900mm (90cm x 90cm). A hobless shower without a door needs to be around 1400mm to 1500mm long and at least 900mm wide to keep the spray contained.
These are recommended sizes, not legal minimums. NSW doesn’t set a single mandatory shower size for homes, so the right size for you comes down to your layout and how you use the space.
| Configuration | Workable Minimum | Comfortable Size | Glass Needed | Best For |
|---|---|---|---|---|
| Compact hobless (with door) | 900mm x 900mm | 1000mm x 1000mm | Frameless pivot or sliding door | Small bathrooms and ensuites |
| Walk-in with return panel | 1200mm x 900mm | 1400mm x 900mm | 800mm to 900mm fixed panel plus a 300mm hinged return | Medium bathrooms |
| Doorless walk-in (single panel) | 1400mm x 900mm | 1600mm x 1000mm | Single fixed panel, 1000mm to 1200mm wide | Standard to large bathrooms |
| Open wet room (no glass) | 1800mm x 1200mm | 2000mm x 1500mm | None, with the whole room waterproofed | Large main bathrooms and accessible bathrooms |
Try the 5-Minute Tape Measure Test
Grab a tape measure and some painter’s tape and run this test in your bathroom:
- Mark the shower zone. Measure 1500mm out from the shower rose (where the shower arm comes out of the wall) and tape a line on the floor. In a shower without a door, the National Construction Code requires a waterstop at least 1500mm from the shower rose, so this line marks your minimum shower zone.
- Check your entry space. Picture a 1000mm fixed glass panel running out from the wall. Do you still have 550mm to 600mm of clear space to walk in without hitting the vanity or toilet?
- Read the result.
- 600mm or more of entry space, and room for a shower around 1400mm long or more: your bathroom suits a hobless, doorless walk-in shower. The shower itself can be 1400mm long, with the waterstop at your 1500mm line.
- Less than about 1400mm of length: skip the doorless design. Choose a 900mm x 900mm hobless shower with a frameless glass door, or a sliding or bifold screen. You’ll still get the flush floor without a wet bathmat every morning.
How Is a Hobless Shower Built?
A hobless shower is built in three stages: the floor is screeded to a fall, waterproofed, then tiled to a linear drain. Without a hob, the floor does the work. A well-built hobless shower relies on three things working together.
Is Your Floor Already Set Down?
A level entry needs room under the tiles for the fall. If your bathroom floor was set down (recessed) when the house was built, that room is already there, and the shower entry can stay level with the rest of the bathroom. If your floor is level, recessing it is difficult and extremely expensive. It’s worth finding out which one you have before you settle on a design.
1. The Right Floor Fall
The shower floor needs to slope towards the drain at a fall of between 1:80 and 1:50. That’s 12.5mm to 20mm of drop for every metre. Too flat and water pools. Too steep and the floor feels awkward underfoot.
The rest of the floor matters too. It needs a fall towards a drain, so any water that escapes doesn’t sit against your vanity or door. If the whole bathroom is designed as the shower, the entire floor must fall towards the drain at no less than 1:80.
Why a Tiled Floor?
Most hobless showers have a tiled floor screeded to a fall, which lets the same tiles run across the whole bathroom. A tiled floor costs more in labour, but it can be built to any size and gives you one continuous floor.
2. A Linear Drain That Keeps Up
A linear (channel) drain is the standard choice for hobless showers. It can go against the back wall, so the floor slopes in one direction, or across the entry, where it acts like a trench. Either way, the drain has to handle more water than your shower head puts out. New homes must use shower heads rated at 9 litres per minute or less (WELS 3-star), and a well-specified linear drain handles that comfortably. Ask for the flow rate.
3. Shower Head Placement
A ceiling-mounted rain head, or a long horizontal arm about 300mm off the back wall, drops water straight down instead of spraying it towards the opening. This makes a big difference in doorless designs.
How Far Does the Waterproofing Go?
In a shower without a door, the National Construction Code requires a waterstop (a strip set into the floor under the tiles that stops water travelling past it) at least 1500mm from the shower rose. The waterstop must finish flush with the top of the floor, so the entry stays level.
What the rest of the bathroom floor needs depends on what it’s made of:
- Timber floors, including particleboard and plywood, must be waterproofed across the whole room.
- Concrete and fibre-cement floors must be water resistant outside the shower area.
- Wall and floor junctions must be waterproof on every floor type.
Empire Bathrooms waterproofs the entire bathroom floor on every job as standard, whatever it’s made of. It goes beyond the minimum, and it means water has nowhere to go.
Already Have Water Escaping? Try These Fixes
If your hobless or walk-in shower already leaks water onto the floor, try these in order from cheapest to most involved:
- Angle the shower head down. At full pressure, the outer edge of the spray should land at least 300mm inside the glass panel. This one costs nothing.
- Add a low water stop strip. A clear PVC or silicone threshold strip, around 5mm high, slows surface water creeping out without creating a trip hazard. It’s a surface fix only and doesn’t replace a compliant waterstop under the tiles.
- Fit a hinged return panel. A 300mm swing panel on the end of your fixed screen can be angled in while you shower to catch side spray.
If water is still escaping after these steps, the problem is likely the floor fall, the drain or the waterproofing underneath. A licensed waterproofer or bathroom builder will need to assess it.
Common Mistakes to Avoid
- Large tiles with a centre drain. Big tiles like 600mm x 600mm don’t bend to a four-way slope without diagonal cuts. If you want large tiles and clean grout lines, use a linear drain so the floor slopes in a single plane.
- Slippery tiles. On a hobless floor, the whole wet area should use slip-rated tiles (P3 or R10). Ask to see the rating before you buy.
What Are the Downsides of a Hobless Shower?
Hobless showers are worth it for a lot of homes, but there are trade-offs to weigh up:
- They can feel colder. A doorless shower doesn’t trap steam, so it can feel draughty in winter.
- Splashing in tight spaces. A doorless shower shorter than about 1400mm is likely to wet the floor.
Hobless vs Traditional: How They Compare
| Hobless, Doorless | Hobless With Door | Traditional With Hob | |
|---|---|---|---|
| Warmth | Can be draughty | Holds steam well | Holds steam well |
| Cleaning | Easiest, no tracks or hinges | Moderate, glass door to wipe | Hardest, hob corners and tracks collect grime |
| Accessibility | Best, no barriers | Very good, wide door needed | Poor, step-over required |
| Bathroom size | Medium to large | Any size | Any size |
How Much Does a Hobless Shower Cost?
A hobless shower costs more. Most of the extra work sits under the tiles. The figures below are indicative, and your final cost will depend on your floor type, whether it’s already set down, your layout and your finishes.
| Item | Standard Shower With Hob | Hobless | Why Hobless Costs More |
|---|---|---|---|
| Plumbing (drain and mixer) | $600 to $1,200 | $850 to $2,200 | Lowering the trap and fitting a linear drain |
| Screeding and waterproofing | $650 to $1,100 | $950 to $1,600 | Waterproofing extends further, often across the whole floor |
| Tiling and materials | $1,200 to $2,500 | $1,800 to $3,500 | Precise falls and one continuous floor across the room |
| Glass | $800 to $1,600 | $700 to $1,800 | A single fixed panel can cost less than a full door |
| Total | $3,250 to $6,400 | $4,300 to $9,100 |
Who Should Build It?
A true tiled hobless shower involves several trades working on the same few square metres: demolition, plumbing, screeding, waterproofing and tiling. That’s where leaks start. If those trades work for different businesses and a leak appears, it’s easy for each one to blame the other.
Your best protection is one licensed builder who takes responsibility for the screed, the waterproofing certificate and the tile falls together. In NSW, anyone doing waterproofing work must hold a licence or certificate for it. Home building work carries statutory warranties of 6 years for major defects and 2 years for other defects. Know who stands behind yours.
Two Questions to Ask Every Quote Provider
- “Will the waterstop sit at least 1500mm from the shower rose, and will you waterproof the whole bathroom floor or just the shower area?”
- “What flow rate is the linear drain you’re specifying, and does it suit my shower head?”
Can You Waterproof a Shower Without Removing the Tiles?
You can fix surface leaks without removing tiles by regrouting with epoxy and replacing the silicone, but a failed membrane means the tiles have to come up. When the problem is worn grout and failed silicone, a regrout can stop surface water getting in:
- Remove old silicone from all wall-to-floor joints and internal corners, then let the shower dry thoroughly.
- Rake out the top layer of floor grout with a grout removal tool.
- Regrout the floor with epoxy grout, which is non-porous, unlike standard cement grout.
- Seal the wall grout with a penetrating sealer.
- Re-silicone all joints with mould-resistant wet-area silicone, then wait for the full cure time on the tube, usually 24 to 48 hours, before using the shower.
This is a repair, not new waterproofing. If water has already got behind or under the tiles, or the membrane has failed, the tiles have to come up so the membrane can be replaced. In NSW, that work must be done by someone licensed for waterproofing. If you’re replacing the shower anyway, it’s the ideal time to go hobless.
Signs Your Current Shower Needs Replacing
A well-built shower typically lasts 15 to 20 years. Check for these warning signs:
- Hollow floor tiles. Tap the shower floor with a coin. A hollow sound can mean water has got underneath and broken the tile bond.
- Swollen skirting or peeling paint on the other side of the shower wall.
- A musty smell that won’t go away, even after cleaning.
- A cracked acrylic shower base. Even a hairline crack can let water into the floor below every time it flexes.
If you notice any of these, get the shower inspected before the damage spreads.
Shower Walls Without Tiles
Yes, you can have a shower without tiles. Acrylic or laminate wall panels are the cheapest option, at around $900 to $2,200 installed. They pair well with a hobless floor if you want fewer grout lines to clean.
| Wall System | Indicative Installed Cost | Typical Lifespan | Maintenance |
|---|---|---|---|
| Acrylic or laminate wall panels | $900 to $2,200 | 10 to 15 years | Wipe down, no grout |
| Microcement | $2,500 to $4,800 | 15 to 20 years | Reseal topcoat every 3 to 5 years |
| Large porcelain or sintered stone slabs | $3,500 to $7,000 | 30+ years | Very low, minimal joints |
Hobless Shower Design Ideas for 2026
Sydney bathrooms in 2026 are moving towards warmer, more textured spaces, and hobless showers suit the look. Popular choices include:
- Hobless floors in microcement or travertine-look tiles, running uninterrupted from the door to the back wall
- Concealed tile-insert linear drains that disappear into the floor
- Fluted or reeded glass screens, which give privacy and hide water spots
- Tiled bench seats built into the shower zone
- Recessed storage, such as a shower niche, so bottles stay off the floor
Talk to Empire Bathrooms About Your Hobless Shower
Empire Bathrooms has been renovating bathrooms and ensuites across Sydney’s Hills District since 2007. One team. One point of contact. Our own team handles the demolition, plumbing, waterproofing and tiling, so one business is responsible for your floor from the screed to the final tile.
Visit our showroom in Dural to see tiles, drains and shower screens in person, or book a free design consultation to find out whether a hobless shower suits your bathroom.
Call 02 8919 4681 or request your free quote online.